How to Give Yourself a Facial at Home
Being stuck at home can be stressful, and as a result, it could take a toll on your skin. If you’re looking for a way to fill your time, give your skin some TLC with this easy and revitalizing at-home facial routine. You’ll feel relaxed and at ease and your skin will get the detox it’s been craving. Here’s a facial routine that anyone can do from the comfort of their home with the help of some Cleure products.
1. Set the Scene
So maybe this step isn’t entirely necessary, but if you want the full spa experience at home, then set the scene. Play some calming music, light your favorite scented candles, put on a cozy bathrobe or your comfiest clothes, and tie your hair up. Remember, you’re trying to destress, so make the experience as luxurious and authentic as possible.
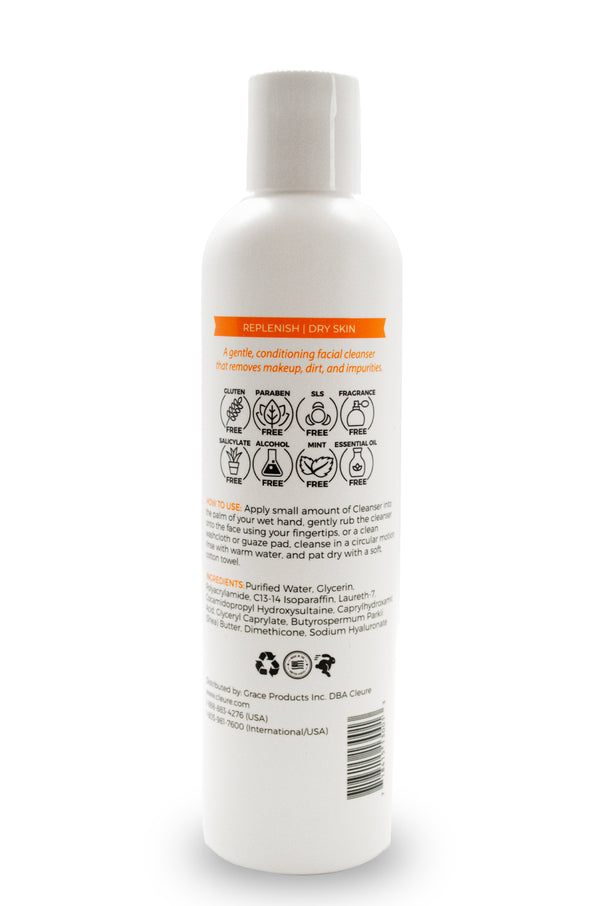
2. Cleanse to Remove Makeup
You’re going to want to start with a clean slate, so the first step is to cleanse with a gentle, oil-based cleanser to remove any makeup, sunscreen, pollution, and surface-level dirt. You can use a cleansing oil, micellar water, a cleansing balm, or any cleanser that contains some kind of oil such as soybean, coconut, or rosehip.
Massage the cleanser into your skin for 30-60 seconds using slow movements to work it into your skin and loosen makeup and dirt. Don’t forget to spread the product down your jawline and neck as well. Once you’ve applied the cleanser, your makeup may be smudged all over your face, but trust the process. Soak a towel in warm water, and lay it on your face for about 30 seconds. Then gently rub everything away.
3. Cleanse Again to Deep Clean Pores
After your makeup is removed, perform a “double cleanse” by using a more traditional foaming cleanser to wash away bacteria and deeper set dirt, sweat, and dust, and to purify the skin even further.
A double cleanse isn’t always necessary, but since you’re treating yourself to a spa-like treatment, this extra step can leave you even more thoroughly cleansed than usual.
4. Exfoliate
Exfoliating is a necessity. It sheds the dead skin cells that leave your skin looking dull, flakey, and rough. It will also unblock the pores so that your skin will be prepared to absorb the other products you use afterward.
You can opt for a scrub or a chemical peel, or you can just use a washcloth or exfoliating brush to slough off dead skin. If you choose the former, make sure to use a gentle scrub that doesn’t rely on overly abrasive exfoliants like sugar, ground-up shells, fruit pits, or volcanic rock.
No matter what exfoliant you choose, be sure that you don’t rub and pull at your skin too aggressively or you risk causing microtears and irritation. Remember this is a facial, so treat your skin the way an esthetician would by rubbing in tight circles gently with clean hands, a damp washcloth, or an exfoliating brush with soft bristles.
5. Steam
Steaming your face helps to open up your pores and soften your skin. There are plenty of steamers on the market, but it’s just as simple to DIY one at home for free. Boil about a quart of water, and transfer it to a bowl. Then place your face over the bowl, and cover your head with a towel so the steam can’t escape, and steam for 5-10 minutes. If you want the full, luxurious spa experience, add some orange peels or cucumbers to the water to give it a soothing scent and added vitamin benefits.
6. Mask
Now that your pores are open, they’re ready for a purifying mask to go in and clean everything out. A clay mask will provide vitamins and calcium, which work to detoxify and refine pores and control oil without completely stripping vital oils. Cleure’s Kaolin Clay face mask also contains deep-sea mud that provides minerals that remove dead cells and improve circulation, as well as fruit acids that prevent signs of aging.
Apply your mask generously and leave to dry for 10-15 minutes. Then remove with a damp towel and gently pat dry.
7. Toner
Use a cotton pad and a bit of toner to wipe away any remnants of face mask, and to lock in hydration and balance your skin’s pH levels.
Read more about what toner does for your skin here.
8. Oil Treatment
If your skin is excessively dry, adding in an oil treatment to your facial routine can be an added bump of moisture you need. There are multiple oils you can use that provide hydration and various vitamins and minerals: jojoba, maracuja, rosehip, and emu oil to name a few.
Pour a small amount of oil into the palms of your hands, and then dab it onto your face and glide across using your entire hand.
If you have acne-prone skin, it may be best to skip this step, because various oils can cause breakouts.
9. Eye Cream
Your eye area is sensitive, has needs that are different from the rest of your skin, and not all face moisturizers are tested and safe for the eye area. The skin around the eye is more delicate and has fewer oil glands than the rest of the face. This makes the skin more prone to dryness and fine lines. Then there are the effects of sleep deprivation and allergies that can cause puffiness and dark circles. Regular moisturizers aren’t formulated with these issues in mind. Using a cream targeted at the eye area will deeply moisturize and provide vitamins that help prevent fine lines, and reduce puffiness and dark circles.
Gently dab a little bit of eye cream on your eyelids and under-eyes. If you want a more soothing spa-like treatment, try storing your eye cream in the fridge for an extra cooling boost that’ll help depuff the under-eye area.
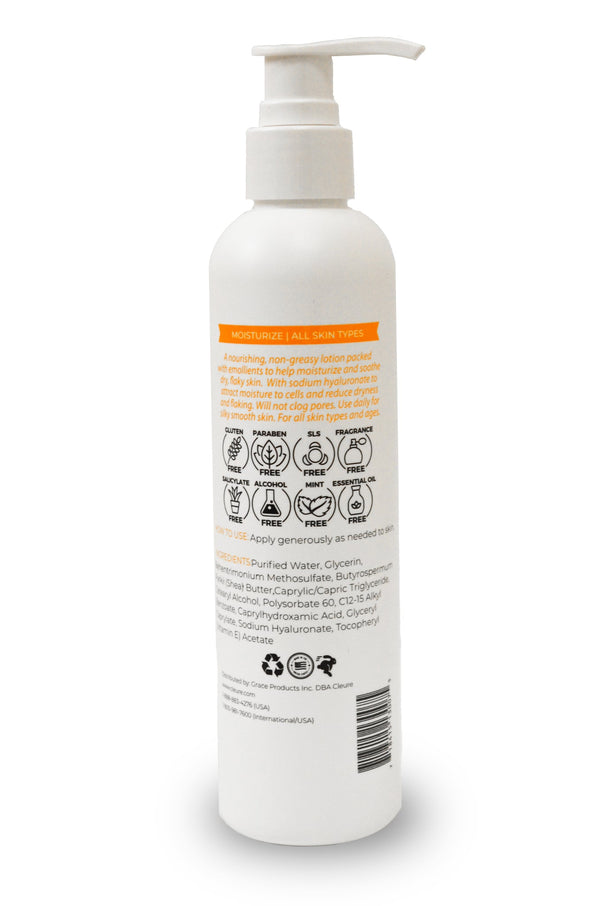
10. Moisturize
When applying serums, oils, and moisturizers you want to work from thinnest to thickest, so the last step of the moisturizing process is to use your richest, most hydrating moisturizing cream. Use your fingers to apply a quarter-size amount of moisturizer to your skin, but don’t completely rub it in just yet.
11. Face Massage
Once you’ve layered on your moisturizer, massage your face firmly in small circular motions before the product absorbs into your skin. This will increase blood circulation and oxygen flow in your face which will relieve tension, increase collagen production, and promote a brighter complexion.
12. Relax
The hard work has been done, and all there’s left to do is relax and let your skin breathe. Lay back, close your eyes, and enjoy the unbeatable feeling of clean, refreshed skin.